How to Use ChatGPT AI in Linux CLI Terminal
Are you looking for a way to use ChatGPT AI to generate text or command right within your Linux CLI terminal?
Do you find it tiring to switch back and forth between different applications just to generate text? Are you looking for a way to utilize AI to generate text or command right within your Linux command-line interface (CLI) terminal? If so, then this article might just be the solution you're looking for. ChatGPT can be used directly within the Linux CLI terminal. Let's begin.
What is & Why ChatGPT?
ChatGPT is an AI language model developed by OpenAI that can generate human-like text. It is based on the GPT-3.5/4 architecture and has been trained on a vast corpus of text, making it capable of generating high-quality text across a wide range of topics.
ChatGPT has transformed the way in which people engage with technology, ushering in a new era of personalized and natural language communication. With ChatGPT, it has become simpler for individuals to access information, accomplish tasks, and communicate with others. This technology has paved the way for more streamlined and efficient communication, resulting in a more convenient and interconnected world for individuals everywhere. From chatbots for customer service to language learning applications, ChatGPT has opened up new opportunities for seamless interaction.
Although ChatGPT has an excellent interface, for tech enthusiasts who prefer the Command-Line Interface (CLI) over the Graphical User Interface (GUI), there are some easy and efficient methods to get ChatGPT up and running. That's right! Developers and communities have created various packages and resources, enabling users to load ChatGPT onto their CLI in just a few minutes.

Prerequisites:
- To start with the process, you will need either a Linux machine or a virtual instance. In case you don't have access to any, you can sign up with a cloud provider such as AWS, GCP, or any other of your choice and set it up.
- Additionally, you will require Python and Python PIP to proceed with the process.
- Python is an essential tool that serves as the foundation of many Linux tools and libraries, including ShellGPT (the command line version of ChatGPT), and ChatGPT itself, which is built using Python as well as other programming languages.

Install Python
Typically, Python comes preinstalled in most recent Linux distributions. To determine the version of Python installed on your Linux machine, you can use the following command: python3 --version
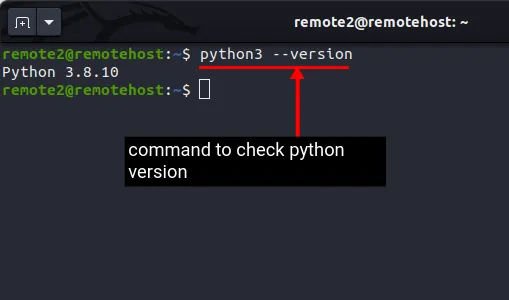
If you're having difficulty locating Python3 on your system, don't worry! It's typically included by default in most systems that are obtained from cloud providers. However, if it's not installed on your machine, you can install it easily by using the following command: sudo apt install python3 -y
Install Pip Package Manager
Once Python3 is installed, the next step is to install Pip Package Manager. Pip is a versatile Python package manager that functions seamlessly across multiple platforms. It simplifies the management of various Python packages and libraries that are required to get ChatGPT up and running on Linux. With just one command, you can install, upgrade, and uninstall all the necessary packages.
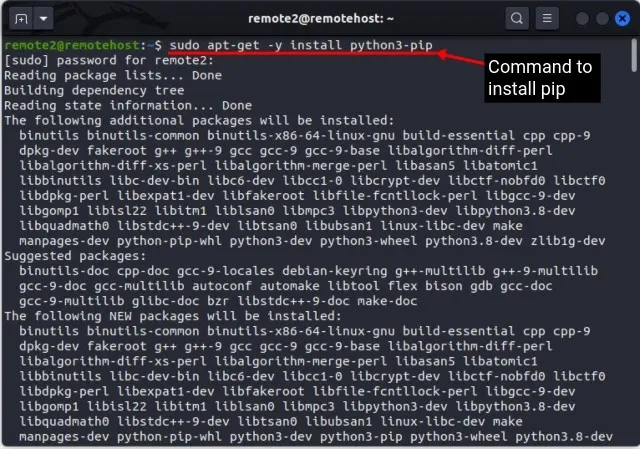
In most Linux distributions, Pip comes preinstalled along with Python. However, if it's not already installed on your system, you can easily install it by running the following command: sudo apt install python3-pip -y
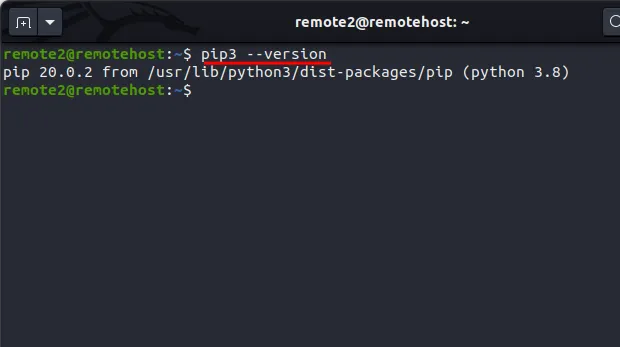
After you have installed Pip Package Manager on Linux, you can verify its version using the command: pip --version
Install Venv Module
While it's not mandatory, it's highly recommended to install the Venv module in Linux if you want to create an isolated virtual environment and avoid potential conflicts with other libraries. Whenever you install a package or library, numerous background dependencies come with it, which can sometimes interfere with other libraries, leading to issues in your project.
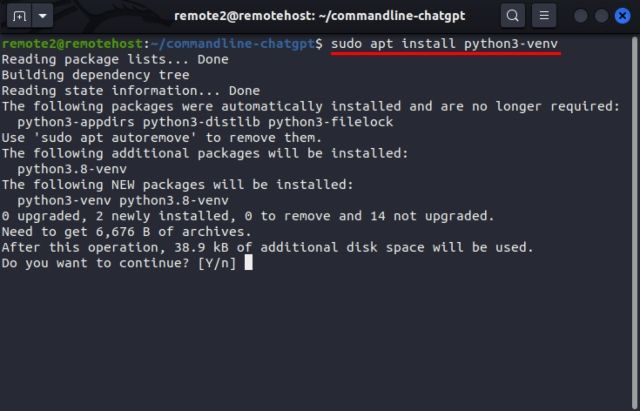
To create a virtual environment for your project, you'll need to have the "venv" module installed on your system. The good news is that it's easy to install using the command below: sudo apt install python3-venv
By running this command, you'll have access to the Venv module, which will allow you to create a virtual environment where you can install all the necessary dependencies for your project without affecting your system-wide packages.
→ The venv module is commonly utilized to create virtual environments within a system.
To do so, we'll begin by creating a new folder and then using that folder as a path to the venv module. Here are the steps to follow:
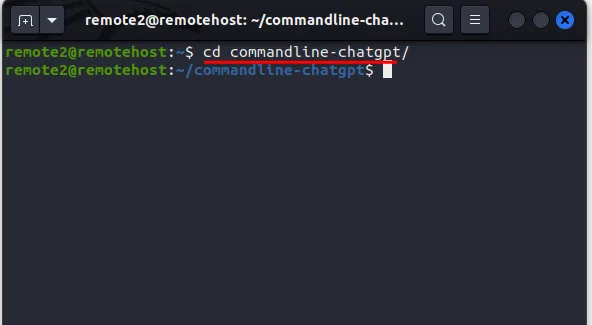
- First, create a new folder using the "mkdir" command, like this:
mkdir commandline-chatgpt - Next, change your working directory to the newly created folder using the "cd" command, like this:
cd commandline-chatgpt
To create a virtual environment using the venv module, execute the command provided below. For the sake of illustration, we will name our virtual environment chatgpt_cli
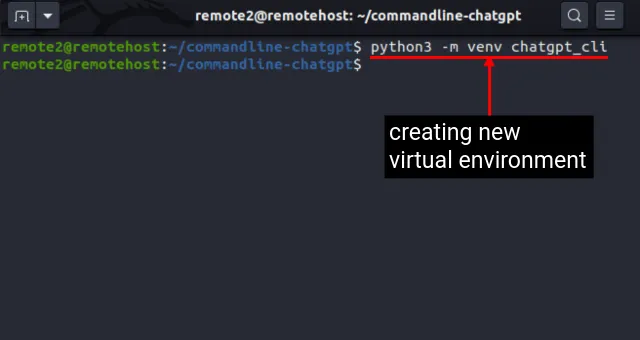
python3 -m venv <virtual_environment_name>
For example: python3 -m venv chatgpt_cli
→ By default, the virtual environment you have just created will be inactive. In order to activate the environment, you need to enter the following command:
source <virtual_environment_name>/bin/activate
After executing the above command, the name of the virtual environment will appear in brackets next to the shell prompt, like this:
(<virtual_environment_name>)<username>@<system_name>
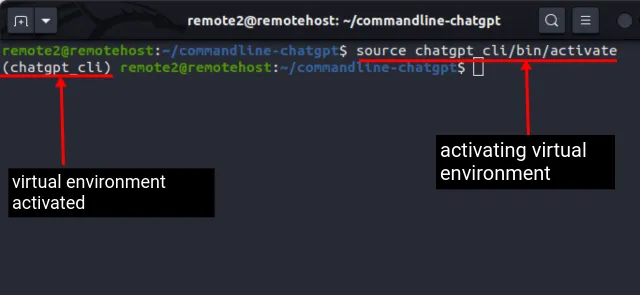
As depicted in the image below, the Linux shell prompt will change to (chatgpt_cli) remote2@remotehost, once you run the commands mentioned above.
Obtain Your OpenAI API Key
To utilize ChatGPT’s services on a Linux system, you will require an OpenAI API key. Currently, OpenAI is offering a $5 credit for trial usage. However, once the credits are exhausted, payment is required for continued access to the API. Here are the steps to acquire an OpenAI API key for the command line ChatGPT chatbot:
- First, visit OpenAI’s website and create a new account. If you already have an account, proceed to the next step by logging in.
- Click on your profile image situated at the top right corner of the screen, then choose "View API keys" from the drop-down menu.
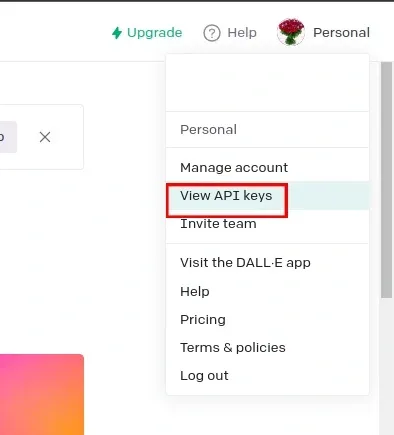
- To create a new API key, click "Create new secret key" button. Any previously generated API keys will be displayed here.

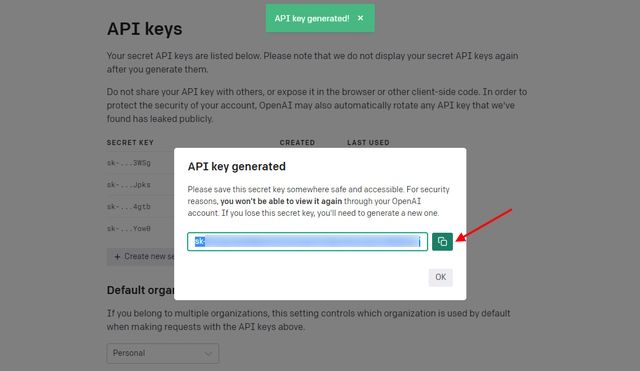
- After clicking "View API keys," a pop-up box containing your API key will appear. It's essential not to share this key with anyone or disclose it publicly. Since you can only view the key once, ensure that you copy it to a secure location. Once you click "OK," you won't be able to copy the key anymore.
Create an environment variable
To use ChatGPT in the Linux terminal, you need to create an environment variable for the API key. Fortunately, this process is straightforward. Simply execute the following command to create the environment variable:
export OPENAI_API_KEY=<your_OpenAI_API_key_here>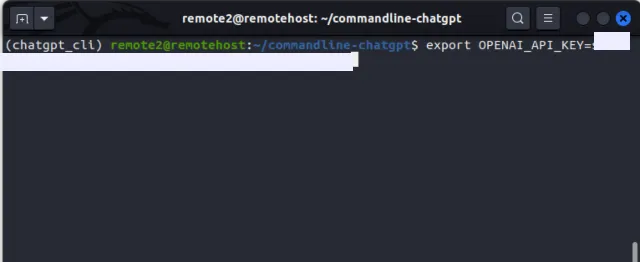
To clarify, the placeholder <your_OpenAI_API_key_here> should be replaced with the actual API key you generated. It's worth noting that in Linux, you can create an environment variable using the export command. This will allow you to securely store your API key and ensure that ChatGPT functions properly.
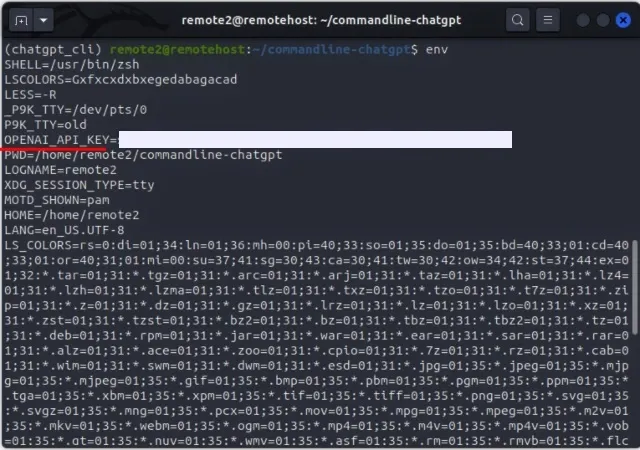
Now, Verify the environment variable by listing it with the command: env
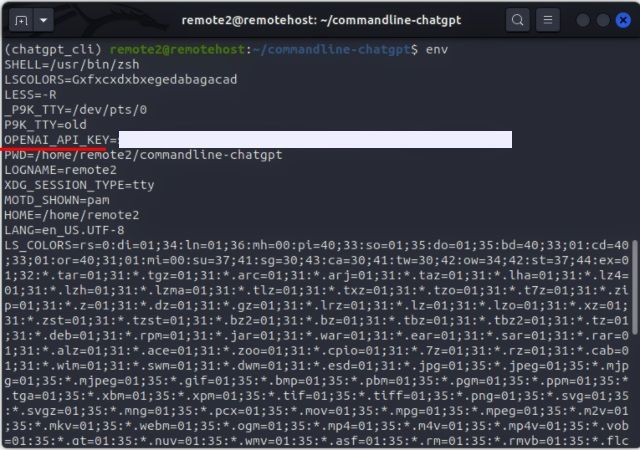
In order to retain the API key permanently, it's essential to store it in a more secure and reliable manner. The temporary storage of the API key during a session could pose a potential security risk. To ensure the safety of your API key, it's recommended to follow the given steps.
export OPENAI_API_KEY=<your_OpenAI_API_key_here>
Firstly, access the ".bashrc" file through the text editor of your choice. Once you have opened the file, scroll to the end of it and add the API key variable to the end of the file. This will ensure that your API key remains secure and accessible for future usage.
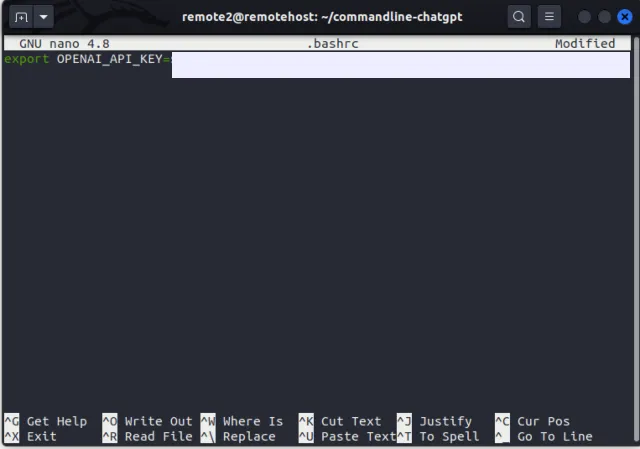
Save the file and exit the text editor after you have added the OpenAI API key. Now, run this command for the changes to take effect: source .bashrc
Finally, verify again the changes with the env command: env

Install ShellGPT to Use ChatGPT
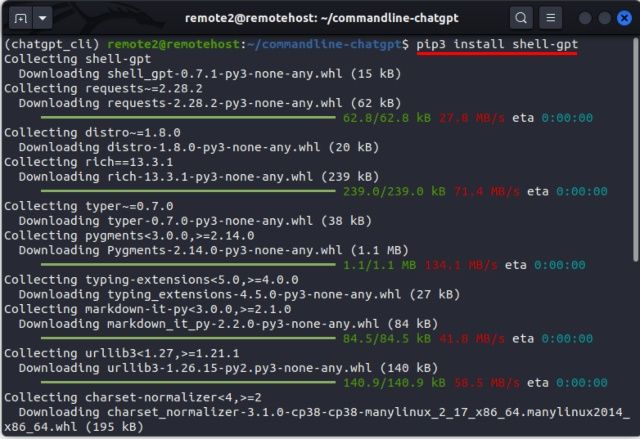
After completing the environment configuration, you are now ready to install the command line version of ChatGPT on your Linux system i.e ShellGPT. It is crucial to note that if you are installing it in a virtual environment, you must skip the "--user" flag. Follow the command provided below to install ShellGPT on your personal computer: pip3 install shell-gpt --user
ShellGPT: Syntax & Options
Once you have successfully installed ShellGPT, you may be eager to utilize it for a variety of tasks. However, before diving in, it is crucial to familiarize yourself with the syntax and various options available to enhance the quality of your outputs. Thankfully, utilizing ShellGPT for multiple purposes is a seamless process, thanks to its user-friendly syntax:
To use the ShellGPT (sgpt) chatbot for different tasks, you can input the following command: sgpt <options> <input_query>
The ShellGPT (sgpt) chatbot offers several options to enhance your experience. Some of the options include:
| Option | Description |
|---|---|
--temperature |
Changes the randomness of the output |
--top-probablity |
Limits to only the highest probable tokens or words |
--chat |
Used to have a conversation with a unique name |
--shell |
Used to get shell commands as output |
--execute |
Executes the commands received as output from --shell option |
--code |
Used to get code as output |
How to Use ChatGPT in Linux Terminal
Examples
1. Using ShellGPT for Queries
To perform any type of query, you can utilize ShellGPT as a search engine. Because it is an AI chatbot, you will receive results with more human-like responses rather than a list of ranked web pages, which is common among most search engines. The syntax for using ShellGPT to obtain responses to your queries is as follows:
sgpt "<your_query>"
2. ChatGPT Chatbot Mode
If you have ever used ChatGPT for chatting, you may have noticed that its responses are similar to those of a human. Now, with the help of ShellGPT, you can even use ChatGPT from your Linux terminal. Simply use the --chat option followed by a unique session name and a prompt.
sgpt --chat <unique_chat_session_name> <input_prompt>
For example, if you want to request ChatGPT to tell you a joke, utilize this command:
sgpt --chat joke "can you tell me a joke?"
3. Generating Code
You can use the CLI-based ChatGPT tool to solve coding problems or create code snippets. Simply use the --code flag to generate code for your prompt, as illustrated below:
sgpt --code "<input_prompt>"
For instance, if you wish to solve the classic Fizz Buzz problem utilizing Python, utilize this prompt:
sgpt --code "Solve classic fizz buzz problem using Python"
4. Generating Shell Commands
Although the Terminal can be a powerful tool to execute complex commands and automate tasks, it can sometimes be challenging for inexperienced users to remember the syntax and options of various Linux commands. With ChatGPT in your command line, you can not only obtain the syntax of a Linux command but also receive the exact command with the required parameters and options.
To accomplish this, use the --shell flag as shown below:
sgpt --shell "<input_prompt>"
For example, if you need to set the read-only permission for all files in the current directory, utilize the command:
sgpt --shell "Make all files in the current directory read-only"
As expected, ChatGPT returns the following output:
chmod -R a-w
Furthermore, if you use the --execute and the --shell flag together, you can even execute the shell command generated directly. For the above example, the syntax would appear as follows:
sgpt --shell --execute "make all files in current directory read-only"
ShellGPT is a powerful tool that seamlessly integrates ChatGPT's capabilities into your Linux terminal. This innovative solution streamlines command-line operations for both seasoned and inexperienced users, while also introducing exciting new features.
What sets ShellGPT apart from other tools is its ability to learn from its users, constantly improving and becoming more useful over time. However, it is crucial to exercise caution and refrain from sharing any confidential information or proprietary code from your organization with any AI models.
We welcome your feedback and thoughts on this impressive command-line tool. Please share your comments below and let us know what you think.


FAQs
What is ShellGPT?
ShellGPT is an AI-powered command-line tool that enhances productivity by generating shell commands, snippets, and documentation. Compatible with major operating systems and shells, it reduces Google searches and saves time.
What is ChatGPT?
ChatGPT is an AI language model developed by OpenAI that can generate human-like text.
How can I use ChatGPT in my Linux CLI terminal?
To use ChatGPT in your Linux CLI terminal, you need to install Python, set up ShellGPT with the OpenAI API key.
What are some tips for using ChatGPT effectively?
Experiment with different prompts, use the appropriate model for your task, and consider security and privacy.
Can ChatGPT be used for sensitive tasks?
It is not recommended to use ChatGPT for sensitive tasks due to potential security and privacy risks.

